Learn how Bitcoin hardware wallets work by building one
An air-gapped signing device made from hobby boards you may already own, an ESP32 DevKit, an ESP32-CAM and a 2.8" touchscreen, with a step-by-step guide for beginners.
A hardware wallet keeps the secret that controls your bitcoin away from your computer, and uses it only to sign transactions. This one is air-gapped. It never connects to the computer by cable or radio. The two sides only show each other QR codes.
Your computer builds the transaction. Sparrow Wallet runs as a watch-only wallet: it can see your addresses and balance, but it can’t spend. It shows the unsigned transaction (a PSBT, a “partially signed Bitcoin transaction”) as an animated QR code, a QR code that changes frame by frame because the data is too big for one code.
The camera board scans it. The ESP32-CAM reads the QR code and sends the data to the signer over one wire. The wire carries data in one direction only. Nothing goes back from the signer to the camera.
The signer checks it, and you decide. The ESP32 DevKit works out the amounts, the fee (what the network is paid) and the change (what comes back to you) by itself, without trusting the computer. It shows them on the touchscreen, and you approve or reject.
The signer signs, and Sparrow sends it. If you approve, the signer signs and shows the signed transaction as a QR code. Sparrow scans it with the computer’s webcam and broadcasts it to the network.
The device uses no Wi-Fi, Bluetooth or USB data in normal use. Your seed, the list of words all your keys come from, is entered each session and never saved on the device.
Hardware wallets can feel like sealed boxes. The best way to understand one is to build one and watch every step happen.
This project uses common hobby boards, so you may be able to start with boards you already own. The guide explains each step in plain language, from wiring the boards to signing your first transaction.
It is honest about what it is: a prototype that runs on signet, a Bitcoin test network where coins have no value. It is a way to learn, not a wallet for real money. Commercial and more mature DIY wallets are ahead of it in many ways, and the comparison below says where.
Prices are approximate: what the builder paid in Kenya, converted at about KSh 130 to US$1 (Central Bank of Kenya rate, November 2026). Expect them to vary where you shop.
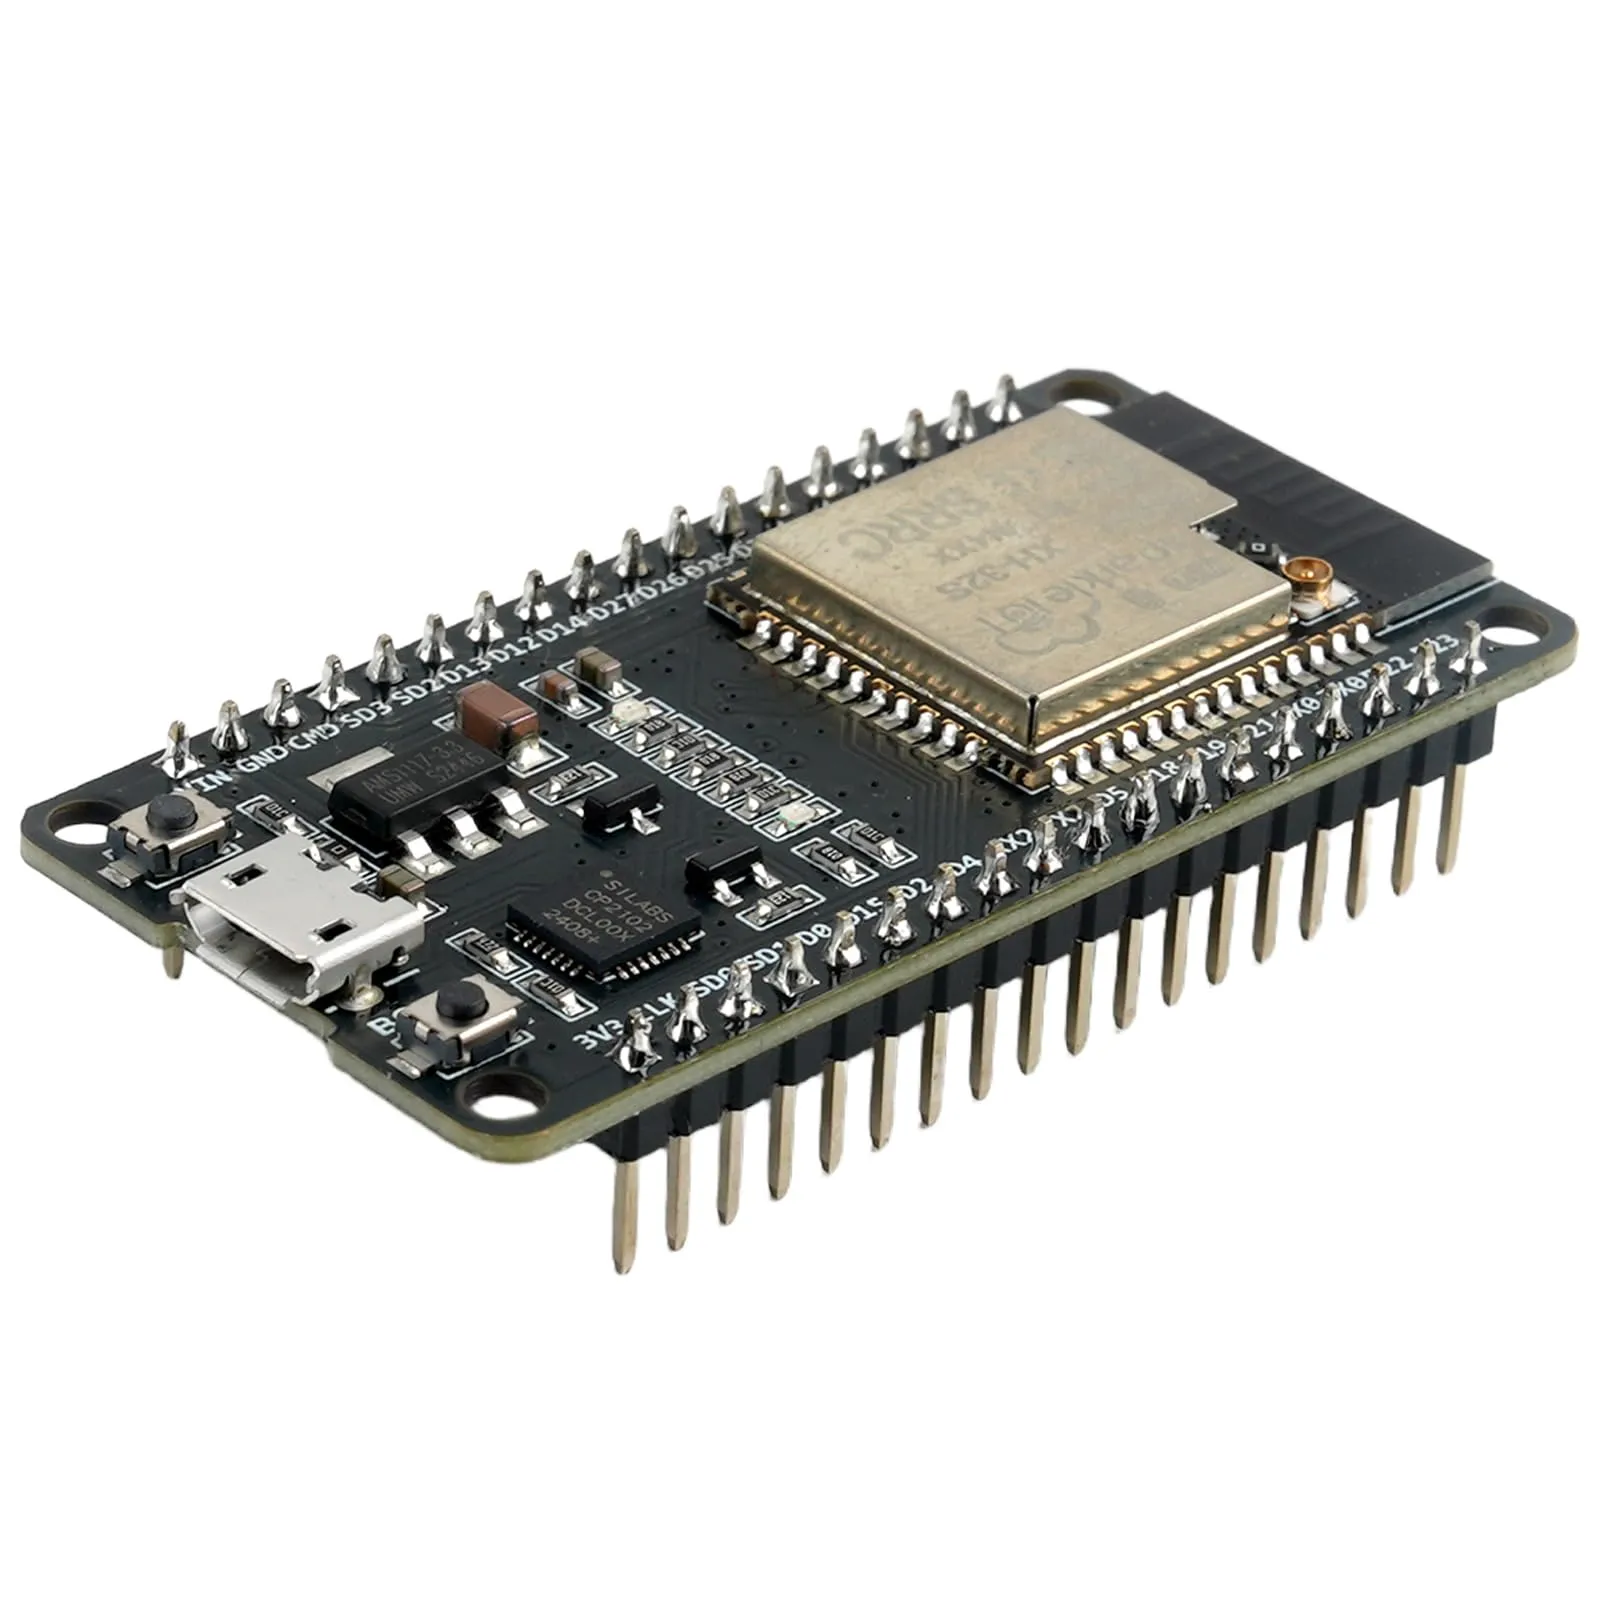
The signer. Holds the seed in memory, checks the transaction and signs it.
Quantity
1
Cost
~$10
A classic ESP32 board with 520 KB of RAM and 4 MB of flash. It drives the touchscreen and receives scanned data from the camera board.
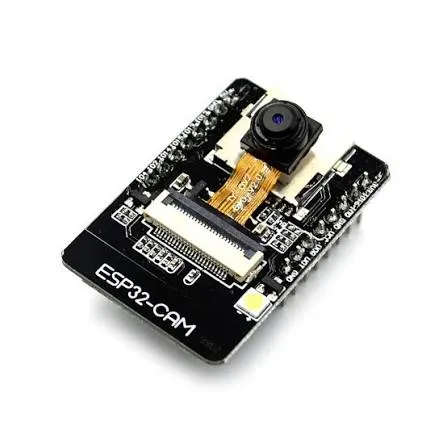
ESP32-CAM (AI-Thinker, OV2640 camera)
The QR scanner. Reads QR codes and sends what it reads to the signer over one wire.
Quantity
1
Cost
~$11.50
It has no USB port, so you program it through a USB-TTL adapter.
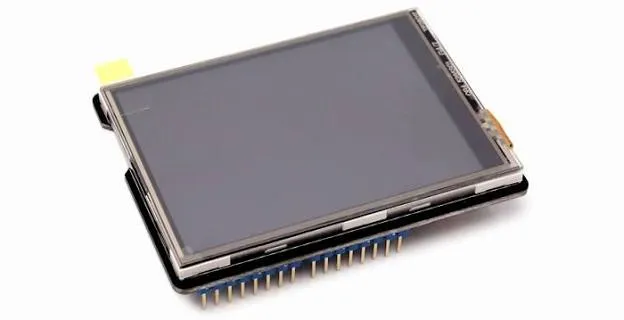
2.8" TFT touch shield
The screen and the buttons. You check every transaction on it and tap to approve or reject.
Quantity
1
Cost
~$14
ILI9341 display (ID 0x9341), 320×240 pixels, 8-bit parallel connection, resistive touch that shares pins with the display. It is wired to the DevKit with jumper wires instead of plugging into an Uno.
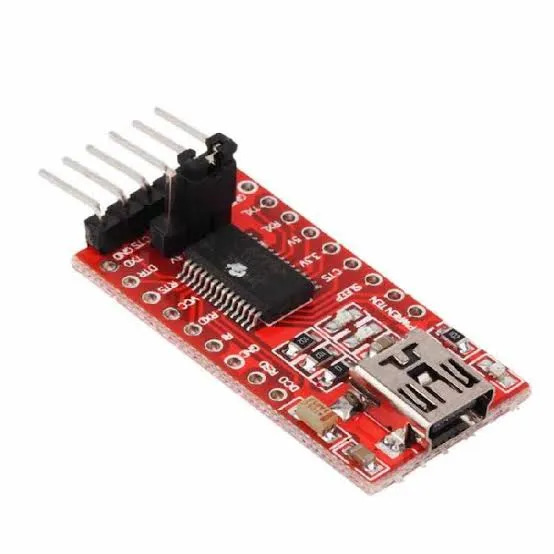
USB-TTL serial adapter (FTDI, CH340 or CP2102)
Programs the ESP32-CAM from your computer. In the tested setup it also powers the camera board.
Quantity
1
Cost
~$5.50
The tested build used an FT232 board whose single jumper sets both the supply and the logic level to 5V. That puts 5V on a camera-board pin, above the ESP32's rating, so a resistor divider on the adapter's TX line is recommended (see the divider part below).
16 for the touch shield, 2 for the camera link and 4 for the USB-TTL adapter (counted from the wiring tables).
Resistors, 1 kΩ and 2 kΩOptional
Bring the adapter's 5V signal down to about 3.3V for the camera board.
Quantity
1 of each
Cost
~$0.02 each
Recommended, but not fitted on the tested build. Adapter TX → 1 kΩ → CAM U0R, with 2 kΩ from CAM U0R to GND. At minimum, one 1–2.2 kΩ series resistor.
Resistor, 10 kΩOptional
Keeps the camera link quiet while the camera board is off or starting up.
Quantity
1
Cost
~$0.02
Optional, and not fitted on the tested build. A pull-up from DevKit GPIO34 to 3V3. Without it the signer receives junk bytes, which it safely throws away.
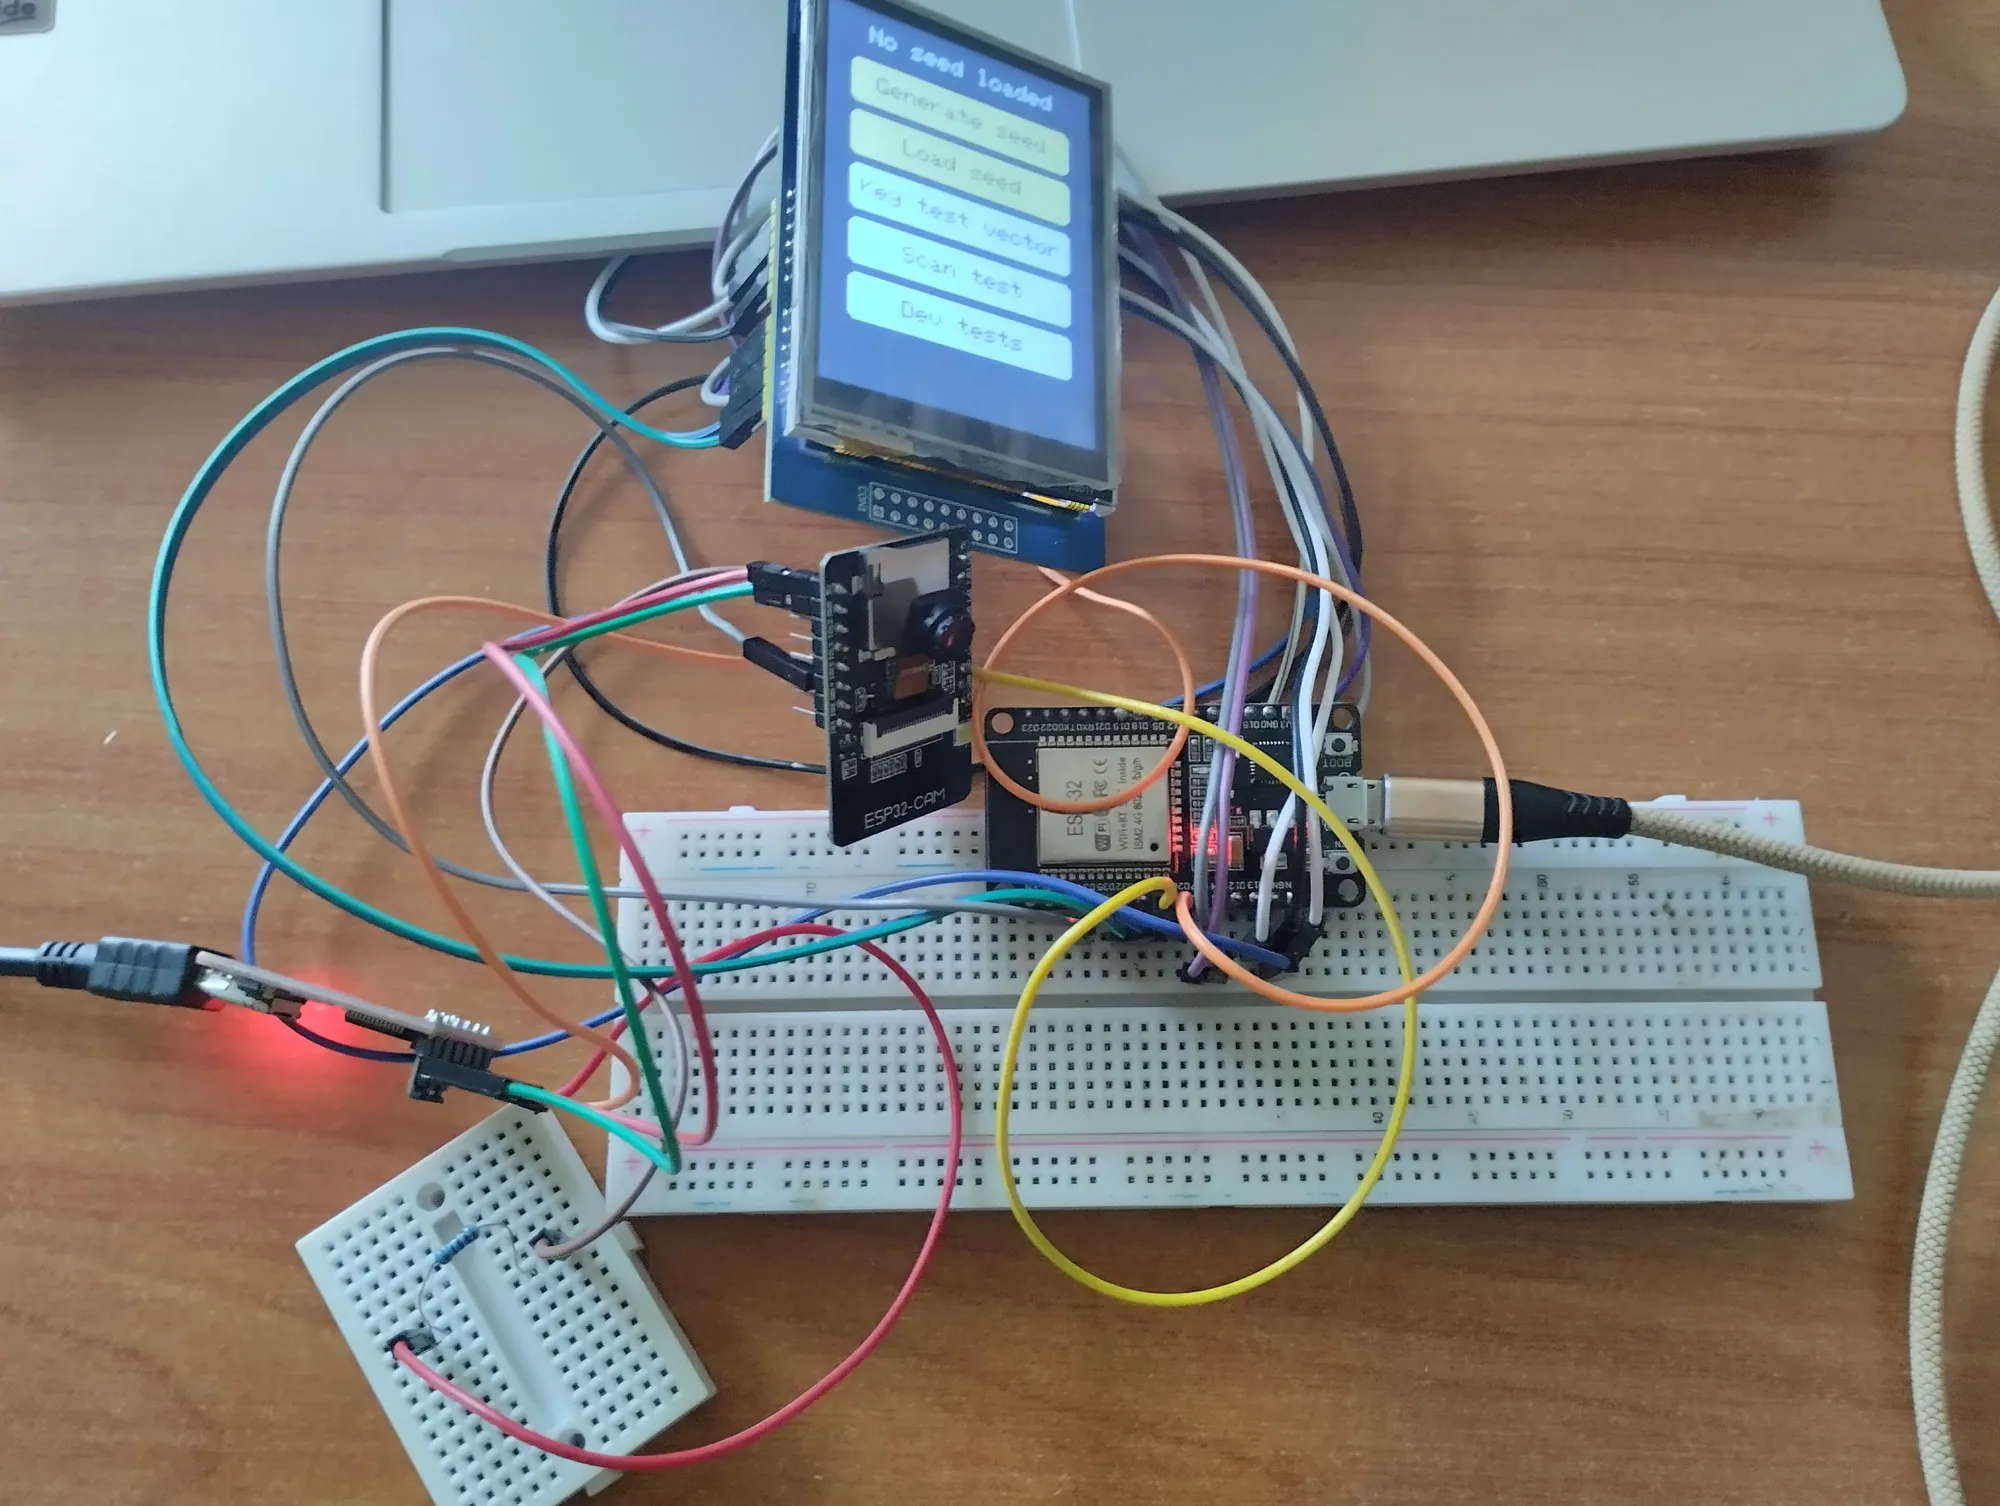
The finished build, with every board wired together:
The tested build. The screen shows the main menu, with no seed loaded.
You also need a computer with Sparrow Wallet and a webcam, to scan the signed QR code back in.
Next for the firmware are hardening (Phase 9) and a written plan for moving to a more secure chip (Phase 10). Other boards are planned too. Neither is built or researched yet.
○PlannedNot built, not yet researched
ESP32-S3 camera board
Espressif lists a camera interface, PSRAM, secure boot and flash encryption for the ESP32-S3. The idea to explore is whether one board could do the job of the current two, with protections this prototype doesn't have yet.
Like the current boards, the ESP32-S3 has Wi-Fi and Bluetooth radios.
○PlannedNot built, not yet researched
Raspberry Pi Pico 2 (RP2350)
Raspberry Pi lists boot signing with the key fingerprint in one-time-programmable memory, and Arm TrustZone, for the RP2350. The plain Pico 2 has no radio; only the Pico 2 W does.
Its product page doesn't mention a camera interface, so how it would scan QR codes is an open question.
See the Roadmap for Phases 9 and 10, and the checklist before the real network.
How does this build stack up against SeedSigner and Blockstream Jade? Here is the price column of the comparison.
Price, and where to get the parts: this build, SeedSigner and Blockstream Jade
Project
Price, and where to get the parts
This projectThis build
About $42 for everything, or about $41 for the four boards: what the builder paid in Kenya, converted from shillings. The ESP32 DevKit, ESP32-CAM, Uno-style 2.8" touch shield and USB-TTL adapter are common hobby parts sold by local electronics shops, and you may already own some of them.Source: parts.yaml (the builder's prices); plan.md §1.1, checked 2026-11-17
SeedSignerDIY
Its README says the parts are "usually < $50": a Raspberry Pi Zero (version 1.3 preferred), a Waveshare 1.3" 240×240 LCD and a Pi Zero-compatible camera.Source: github.com, checked 2026-11-17
Blockstream JadeCommercial
On the Blockstream store, the regular price of Jade is $79.00 USD. Jade Plus is sold only in bundles, such as Jade Plus with JadeLink at a regular price of $189.00 USD.Source: store.blockstream.com, checked 2026-11-17
The full comparison adds what you learn by building, and security, with every source.